June 20, 2010

USArtQuest Blog Hop and Project

Welcome to the inaugural blog hop for the new USAQ Design Team!  We've been busy creating cool projects using the Draw and Gild kit.  In addition to hopping from one DT blog to the other to see the fabulous creations, you can enter to win one of the Draw and Gild kits so you can see for yourself what all the excitement is about.

There are some rules, of course, to be eligible to win.  You must stop by the blog of each DT member and enter a comment on each blog before 11:59 P.M. ET on June 27, 2010.

To make it even easier for you, I've listed all of the blogs below so you can simply click on the DT member's name and you'll be taken to her blog.  Oh, and one more thing, you need to hop in order starting with Sarah's blog!


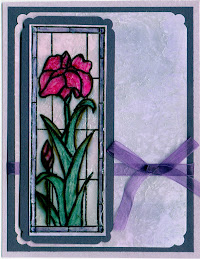
Before you go, however, don't forget to check out the awesome frame I made for the hop.  Most of you know I'm a cardmaker at heart but this is a special event so it calls for a special project.

I did get a bit carried away working on this project and couldn't seem to restrict myself to just using the supplies in the kit.  The quality of the USAQ products is phenomenal!

With the exception of the frame, all supplies can be purchase at USAQ's online store.


Gildenglitz - gold
Fine Liner tool
Duo Glue
Paint brush
Perfect Pigments - titanium white, deep sky blue, cobalt turquoise hue, magenta, purple mist
Perfect Glaze - clear
Perfect Paper Adhesive Gloss
Crystal Effectz
Wood frame

Paint the frame with a base coat of white.  Mix glazing medium into the blue, turquoise and purple acrylics.  Using the little yellow sponges that come with the acrylic paint kits, layer the paints starting with the turquoise and adding highlights with the blue and purple.  Remember to let a little of the white base show through.

When the paint is dry, place a couple of drops of Duo Glue into the Fine Liner and let your imagination (and your hand) wander, creating swirls and squiggles all over the frame.  Remember, when the Duo Glue is clear, it is ready to adhere.  This is your sign to add the Gildenglitz, pressing the flakes gently into the glue.  Use the texture sponge to brush off the excess flakes, which can be used in the next step.  To add a little interest, I placed a drop of Duo Glue on my finger and created a few smudges here and there, adding more Gildenglitz to bring them to life.

For the finishing touch to my frame, I coated the frame with PPA gloss and lightly sprinkled a bit of Crystal Effectz.

I typed up one of my favorite prayers and inserted into the frame.  Not only am I reminded of the message, but seeing it in the beautiful frame puts a smile on my face. 

Now, get hopping and good luck on the drawing!

Connie

P.S.  If you don't win or just can't wait, you can always purchase your own kit!  You won't be disappointed.

May 28, 2010

Big Announcement


It's time for the big announcement - drum roll, please . . . . USArtQuest has formed a new design team and I am very excited and honored to have been chosen to be a member.  Other members of the team include Jan Hennings, Jessica Griffin, Julie Ranae, Lea Cioci, Sarah Anderson, Suzi Blu, and Terri Sproul.  Check out their fabulous blogs (links located on the right).

I had the pleasure of spending time with Susan Pickering Rothamel at her store and studio last year to learn all about the fabulous, artist-grade products offered by USArtQuest.  If you've taken any of my classes, you know how much I love this line.  Feel free to leave a comment and tell me what you think about the USAQ line.  Don't know what I'm talking about?   Well, hop on over to the USAQ website and check them out.  You'll also find some great how-to videos featuring several of the products.

Stay tuned for more news and happenings in the upcoming weeks!  This would be a good time to become a follower of my blog and to sign up for automatic email notifications so you don't miss out on any of the buzz!

Thanks for visiting.

May 26, 2010

Big News!!!

I have some very exciting news to share with you - I've been published again in the July issue of CardMaker Magazine.  My article is all about reverse stamping  and includes three cards, each using a different technique.

But wait -there's more!  I am about to embark on another aspect of my creative journey and I'm not going to do it alone.  Want to know why I'm all smiles and about to burst at the seams????  Well, I can't tell you just yet - you'll have to check back in a couple of days to find out all the details on this one!

In the meantime, I thought I'd share a quick card that is appropriate for the upcoming holiday weekend - the unofficial start to summer - yippee!  This cute little chef is from Inky Antics and the inside contains the verse "my condiments to the chef" - also from Inky Antics.  Wouldn't this make an adorable thank you card to send to your host/hostess for this weekend's barbecue or picnic?

I colored this with my Prismacolor pencils and Gamsol.


May 2, 2010

CBD Card Contest Winners

Our first quarter card contest from my Cheaper By The Dozen class is over and the results are in.  We actually had a tie for first place so I asked my craft sister, Peggy, to cast the tie breaker vote to keep the judging as unbiased as possible.  Although the contest is set up to only have one winner per contest, I decided to do a first and second place this time.

And the 1st place winner is . . . . Barb Voelkel!  Barb submitted a twist on the "cocoa monkey" pocket card.  Using some printed paper, an embossed and popped coffee mug and a palette of soft greens, shades of taupe and accents of black, Barb created a winning card.  On the inside of the card, she layered the scalloped pocket and repeated the circles punched from the printed paper.  Tucked inside the pocket was a packet of cocoa and a coffee stirrer - a greeting card and a gift all in one.

Our 2nd place winner is the fun-loving team of Bonnie Brill and Jan Heller.  Their card was also a twist on the "cocoa monkey" pocket card.  Bonnie and Jan used a completely different color palette - purples, pinks and greens and included a packet of seeds in their Mother's Day version.  What a clever idea!

Thanks to all who submitted cards and to all my fabulous "Cheaper Chicks" for voting.  Don't forget that entries for the 2nd quarter contest are due to me by July 1.  Click here for all the contest rules.  Check the class list on the right for future dates of CBD classes.

Congratulations to Barb, Bonnie and Jan!


May 1, 2010

Alex the Patriotic Pup

With Mother's Day just around the corner, I decided to spotlight one of my "kids" for the MiTi at Marco's Paper yesterday.  I turned an easel card into a photo frame easel card by simply layering a piece of acetate over a decorated piece of cardstock.  By using brads to hold the acetate in place, you can easily change the photo by simply sliding it under the acetate.

We used the watercolor palettes and the fine liner tool from USArtQuest to make the card.

If you weren't able to join us yesterday, check back in the next day or so and I'll post my usual step-by-step instructions.

Happy Saturday!


April 17, 2010

Fallen off the face of the earth . . .

Just in case you were wondering, I haven't fallen off the face of the earth (yet).  I have been a bit busy lately and that is likely to continue for awhile so my posts will continue to be a bit sporadic.

I normally don't post cards from my classes but I thought this card (from a recent Cheaper by the Dozen class) was quite appropriate for today's post.  I will be at the Adventures in Stamping convention in Akron this weekend, doing lots of demos in the Marco's booth.  This card combines two of the demo topics - coloring with Copics and embossing with the new electric Sizzix machine.  I'll also have the new stamp positioner from Scor-It and the new distressing tool from Zutter so be sure to stop and say hi!  The flower stamp is from Magenta.

If you can't make it to the convention but live in the Dayton area, I'll be doing a free Make-it/Take-it at Marco's on Friday afternoon (04.30) as part of their Spring Spectacular.  You can check out all the cool happenings on Marco's website - scroll down to the week of April 25th.


March 10, 2010

Going Green for St. Patrick's Day

Are you ready for St. Patrick's Day? I actually made this card the first year I started stamping.  As you can see, I had so much fun with the card that I just kept going and made a matching green envelope with a hand-stamped liner paper.   Over the years, decorating envelopes has become my unofficial trademark.  And, why not?  You've already got the supplies ready to go so add a stamped image, a dusting of color and a little surprise inside . . .