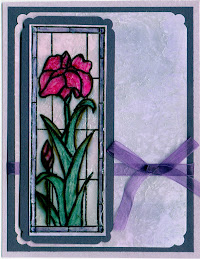
At long last, I'm finally getting around to posting the winners from the 2nd quarter "Cheaper By The Dozen" card contest. If you don't know what the contest is all about, you can find the details here.
The first place winner is . . Barb Voelkel. Barb's card is a twist on the easel card we did in class. What you can't tell from this photo is the amount of time Barb invested in making this card - she popped the butterflies and repeated the theme on the inside of the card and envelope.
And, for this contest we also had a 2nd place winner . . . Marlene Leugers. Marlene's card is a twist on the card we made using a template cut from the Nestabilities scalloped rectangle. Instead of sponging color inside the "frame" portion of the template, Marlene used the die cut shape and sponged color around it, leaving the center white.
Congratulations to Barb and Marlene and a big thanks to all who played along this quarter.
Don't forget, if you want to play along you need to attend one of this quarter's classes and submit your card(s) directly to me by October 1.
Showing posts with label Nestabilities. Show all posts
Showing posts with label Nestabilities. Show all posts
August 29, 2010
February 28, 2010
Make-it / Take-it at Marco's Paper
Yesterday, I had the pleasure of hosting the Make-it / Take-it at Marco's Paper in Centerville. We had several ladies join us to make this fun card, despite the cold weather and snowy roads left over from Friday night.
If you weren't able to join us, I've posted the supplies and steps for making the card below.
Supplies (all are available from the fine folks at Marco's Paper)
o 5-1/2” x 8-1/2” Carnival Cover cardstock – 80# pine
o 4” x 5-1/4” and 1-1/2” x 3-3/8” Cougar cardstock – 80# white
o 2-1/4” x 6” Kaleida Paper cardstock – 80# pink
o “Little More” rubber stamp by Rubber Cottage (RC-436D)o Spellbinders Nestabilities – Long classic scallop rectangles (S4-145)
o Spellbinders Impressabilities – Pebbles (I2-1010)
o 10” of sheer pink ribbon
o Distress dye ink pads – Peeled Paint, Worn Lipstick, Scattered Straw
o Flower Soft – Sweet Pea or Spring
o Foam tape or pop dots
o Swirl punch from EK Success (PSM87C)
o Sponges
Emboss white cardstock with “Pebbles” Impressabilities plate. Arrange embossing plate so that it is on the raised design side of the cardstock. Sponge entire piece with pink, yellow and green inks. Remove embossing plate.
Wrap ribbon around front of embossed panel and secure on back side with tape, trim off excess ribbon (save for later use on card front). Adhere embossed panel to front of card.
Cut scalloped rectangle and punch (2) swirls from pink cardstock. Stamp verse on white panel with green ink; edge piece with green ink and adhere to pink scalloped rectangle. Adhere panel to card front over ribbon using foam tape. With excess ribbon, loop around ribbon on card front and tie a knot on the right side of the card.
Adhere one swirl at top edge of verse panel with foam tape. Adhere second swirl on top of first swirl, offsetting the image to create a flower. Place a dot of glue in the center of the flower and add a small bunch of Flower Soft for the center.
We used the Wizard machine but the Impressabilities and Nestabilities will work with other die cut/embossing machines. If you're having trouble getting a good impression, try spritzing your cardstock with Paper Glide first.
Check your calendar for Saturday, March 6th - I'll be hosting another Make-it / Take-it at Marco's. Check back later in the week for a sneak peek . . .
Labels:
Impressabilities,
Marco's Paper,
Nestabilities
Subscribe to:
Posts (Atom)


