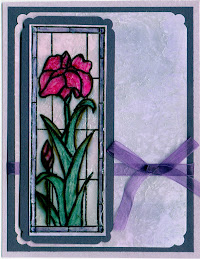
This is what the finished project will look like:

You'll need the following general supplies:
- Card stock for an A2 size card and a 5-1/2" x 6" piece of card stock to match the card
- Printed papers, coordinating card stock, punches, stamps, ink pads, etc. to decorate the card
- 1/4" and 1/2" wide red line tape
- Other adhesive, paper trimmer and scoring tools
I'm assuming you can figure out how to decorate the card, so I'm only going to provide photos (click to enlarge) and instructions for the pop-up gift card assembly, followed by some general notes on how I decorated my MiTi card.
Start by cutting a piece of card stock 5-1/2" x 6" and place it in your Scor-Pal (see photo). This is the piece you will use to make the pop-up.
Note: For illustration purposes only, I'm using yellow and green card stock in some of the photos and I've highlighted the scoring marks with black and red markers.
Next, score your card stock at the 1-1/2", 3" and 5-1/2" marks (black lines in the photo).
Move your card stock to the right so that the line you originally scored at the 3" mark is now aligned with the 4-1/4" slot (see the red arrow in the photo).
 With the 3" score line aligned with the 4-1/4" mark, score the panel at the 5", 5-1/2" and 6" score lines (red marks in the photo).
Fold the card stock on all scored lines. The middle red line is a valley fold. All others are mountain folds.
Place 1/2" red line tape just below the bottom score line and 1/4" red line tape just above the top score line. You'll also need two small pieces (about 1/2" in length of either width) positioned at either end of the piece just above the 3rd score line (below the valley fold).
Do not remove the tape liner until you are ready to adhere that portion to the card. It will save you a lot of frustration later . . .
Now, it is time to place the pop-up assembly into the card. Remove the tape liner from the 1/2" strip at the bottom of the panel. Line it up just below the inside fold line of the card and press it onto the bottom half of the card.
 Fold the panel back on itself at the second score line (top of the decorated panel. Remove the tape liner from the two small pieces and press sections together on the valley fold line. In my illustration, the "1/2" marking and the little square will be pressed together.
 This forms the "pocket" for the gift card to sit in.
Remove the tape liner from the 1/4" wide strip.
 Press the front/top of the card down over the exposed tape to adhere it. Press firmly.
Open the card and ***presto*** just like magic, your gift card holder pops up!
NOTE: If you don't have a Scor-Pal, you can use the Score-It Board or a bone folder and ruler. Laying your card stock in the same orientation (6" width running left to right), score at 1-1/2", 3", 3-3/4", 4-1/4", 4-3/4" and 5-1/2". The rest of the instructions will be the same.
For my "Cool Yule" MiTi card, my supplies were:
- White, dark green and dark red card stock (Marco's Paper)
- Printed paper (JoAnn's)
- "Cool Yule" stamp (Judikins)
- "Trees" stamp (Judkins)
- "Happiest Holidays" stamp (Verses Rubber Stamps)
- "Dots" and "Snowflakes" stubbies (Stamps by Judith)
- Tree and zig zag border (Accucut dies)
- Mementos dye ink pads - Summer Sky and Cottage Ivy
- Memories dye ink pad - white
- Stamp snowflake and dots with blue ink on top half of white card
- Stamp "Cool Yule" verse in green ink
- Adhere printed paper to bottom portion of front card
- Adhere strip of dark green card stock across bottom edge of card - use die cut, border punch or decorative scissors to jazz it up!
- Die cut tree from green card stock and stamp dots with white ink. Adhere with foam tape.
- Cut and score pop up assembly panel. Decorate panel before applying tape!
- Follow instructions above for pop-up assembly.
- Stamp verse with green ink and mat with dark red card stock. Adhere to inside panel.


No comments:
Post a Comment